Published on December 22, 2025
Updated on April 2, 2026
Table of Contents
Can’t access BIOS no matter which key you press?
You’re not alone, and the fix is simpler than you think.
BIOS access depends on your motherboard brand (Asus, MSI, Gigabyte, etc.), and each uses different keys, such as F2, Delete, or Esc during startup.
On modern Windows 11/10 systems, fast startup and UEFI can make entering BIOS harder, especially on newer PCs with fast SSDs.
In this guide, you’ll learn the exact methods to open the BIOS on any PC, quickly, safely, and without guessing.
What Can You Do in BIOS? (And Why It Matters)
Accessing the BIOS (or UEFI) on your Windows 11/10 PC is essential for adjusting low-level firmware settings, such as changing which drive or device your PC boots from first (SSD, HDD, USB), enabling XMP (Extreme Memory Profile) to overclock your RAM, adjusting CPU voltages, or enabling or disabling “Secure boot” (Required to install a fresh Windows 11), etc. The list goes on and on.
What Is BIOS vs UEFI 101?
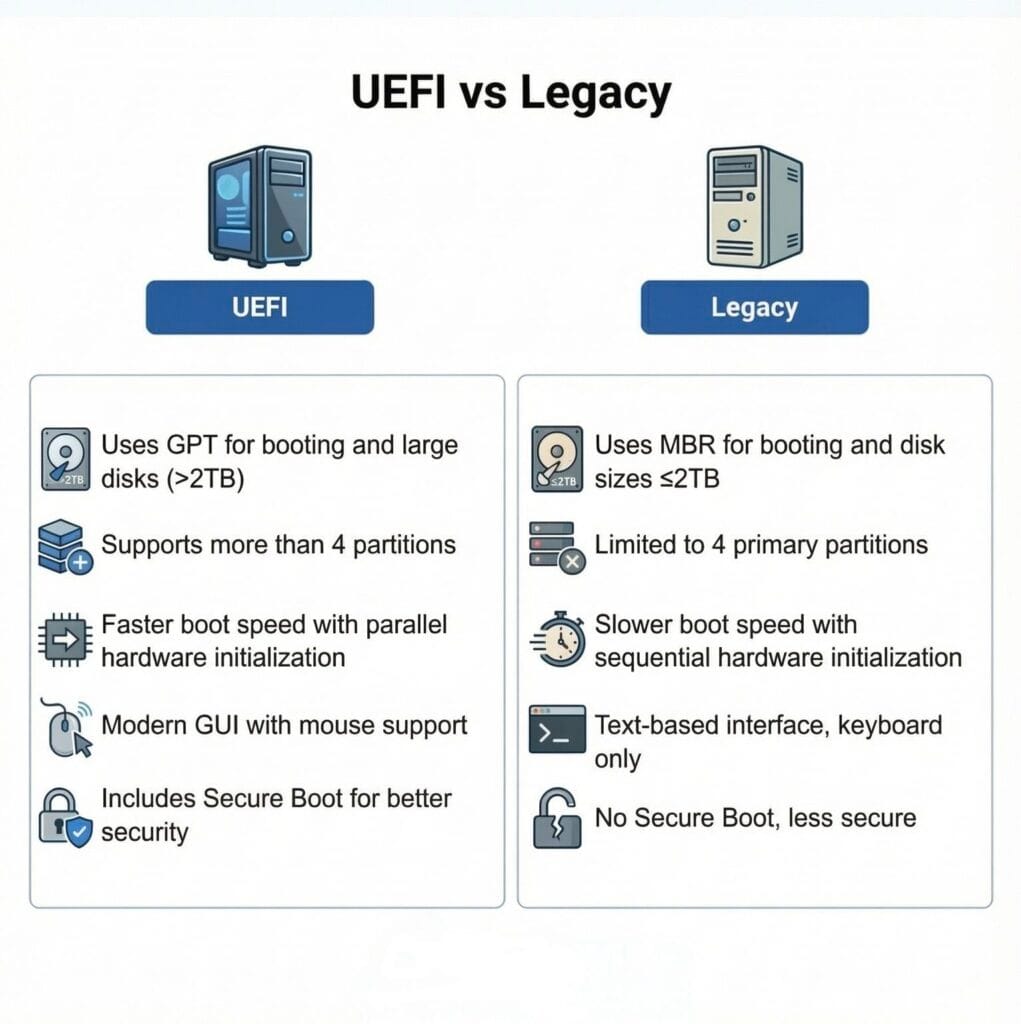
BIOS (Basic Input/Output System) is the traditional text-based firmware that’s been used in PCs since they first came out. It is minimal compared to the modern successor standard, UEFI.
The legacy BIOS initializes your hardware every time you turn on your computer, looking for incompatible or damaged hardware in a process called POST. Next, it hands control over to your operating system, whether it’s Windows, Linux, or another OS.
You can read a lot about BIOS and its history on Wikipedia.
UEFI stands for (Unified Extensible Firmware Interface). It is the modern replacement for BIOS, with modern features required by modern operating systems, such as a welcoming and user-friendly graphical interface (GUI), better security measures, such as “Secure boot”, and larger drives with over 2TB support thanks to the modern GPT disk partitioning scheme, etc.
Most modern PCs with Windows 11/10 installed use UEFI rather than legacy BIOS, but in guides and tutorials, it’s still used interchangeably. Using “BIOS” in guides today usually just means accessing the motherboard’s firmware interface, regardless of whether it is BIOS or UEFI.
You can also read more about UEFI and its history on Wikipedia.
Can’t Enter BIOS? Here’s How to Fix It
If you’ve tried pressing the BIOS key and nothing happens, don’t worry, this is a common issue, especially on modern Windows 11/10 systems. Here are the most common reasons and how to fix them:
You’re Pressing the Key Too Late
You can only access the BIOS during the first seconds of startup when it shows the respective keys to do so. To fix that, you should restart your PC and try to press the BIOS key (F2, DEL, ESC, etc.) repeatedly as soon as the screen turns on.
Keyboard Not Detected
Some modern USB keyboards may not work properly early during boot. You can try a different USB port (preferably USB 2.0) and use a wired keyboard instead of a wireless one.
Wrong BIOS Key for Your Brand
Each motherboard manufacturer uses different keys. You can try the common keys such as F2, DEL, ESC, F10, or check the BIOS key table below.
Your PC Boots Too Fast (SSD / NVMe)
Modern PCs with fast SSDs and NVMes may skip the BIOS entry window almost instantly. To fix this, you need to use the Windows Advanced Startup method (1st Method) or hold both the “Shift + Restart” from the Start menu to access the BIOS automatically.
3 Easy Ways to Open BIOS in Windows 11/10
Method 1: Use Advanced Startup in Windows (Recommended)
Both Windows 11 and Windows 10 have a built-in feature called “Advanced Startup,” which grants you safe and quick access to either your BIOS or UEFI without needing to press any keys during boot. The thing is, this method works on both desktops and laptops.
This is the most recommended approach, especially if your PC boots too fast to catch the traditional BIOS hotkey. Follow our steps to know how:
First, Press Windows + I on your keyboard, or click the Start menu and select Settings.
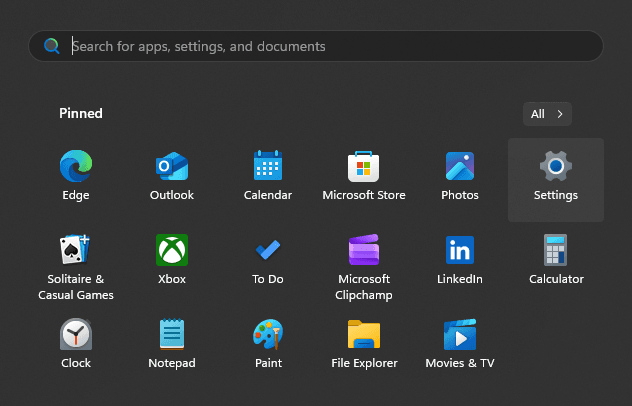
Both methods will open the Settings app window, where you can manage all Windows 11 / Windows 10 system configurations.
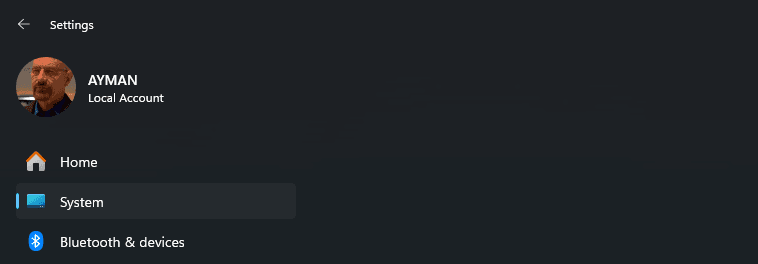
Second, in Settings, go to “System” in the left-hand menu.
Scroll down until you find an option called “Recovery” and click on it.
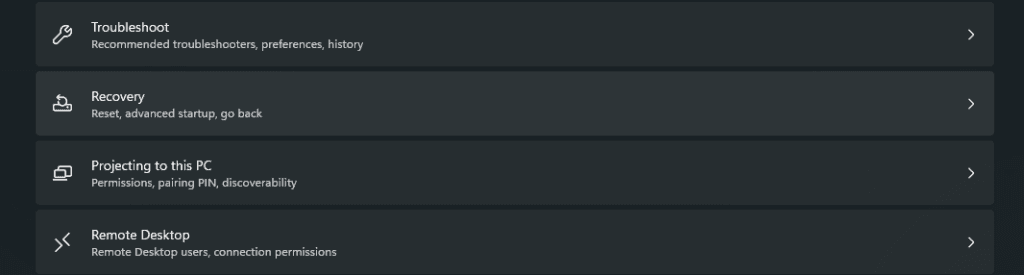
Here you will find options related to resetting your PC, troubleshooting, and advanced startup.
Third, besides the “Advanced startup” section, click the “Restart now” button.
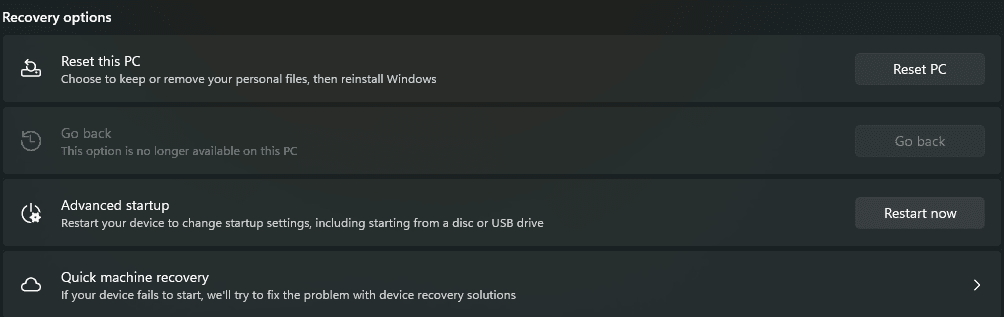
A prompt may appear asking you to confirm that you want to restart your device now. Click on “Restart now” again.
Now your PC is ready, and it will reboot into the Advanced Startup Menu instead of booting into Windows normally.
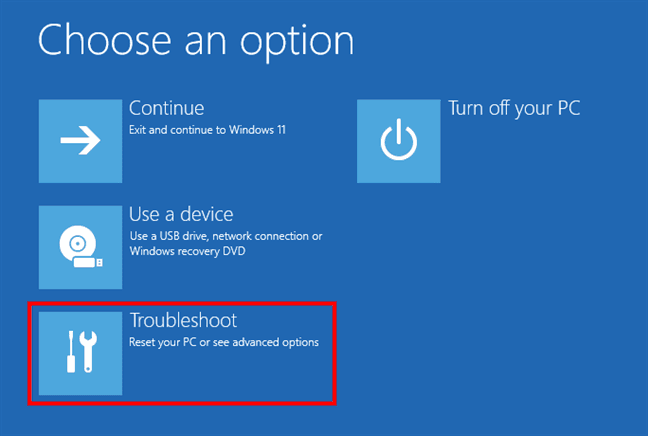
Fourth, once your PC restarts, you will be greeted with the “Choose an option” screen.
Next, click on “Troubleshoot” to continue. Troubleshoot lets you reset your PC, use advanced tools, and access your firmware settings (BIOS).
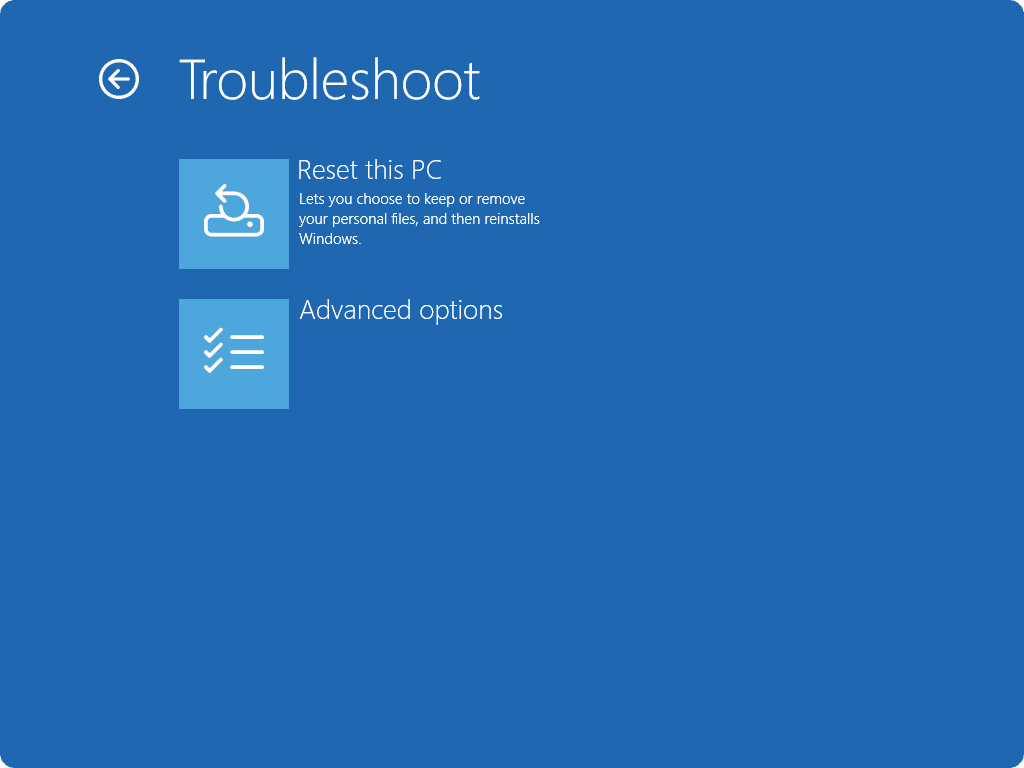
Fifth, once you are inside the Troubleshoot menu, select “Advanced options”.
Here you’ll see multiple built-in tools, such as System Restore, Command Prompt (initiating CMD), Startup Settings, and UEFI Firmware Settings.
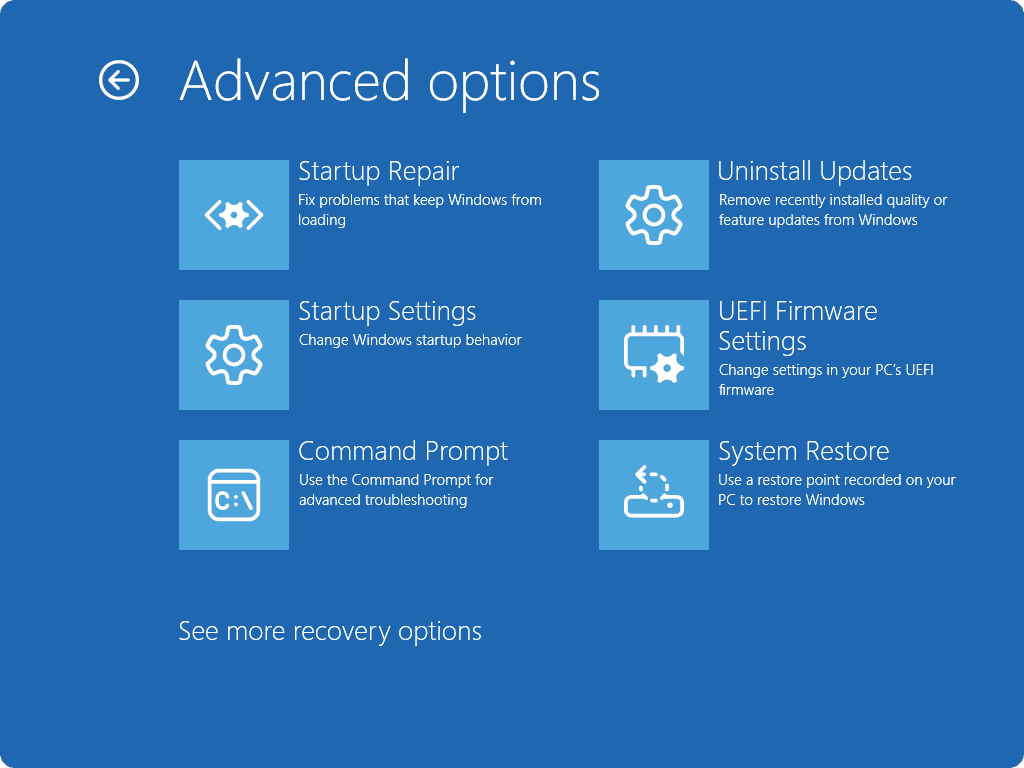
Sixth, click on “UEFI Firmware Settings”.
A description will appear explaining that selecting this option will restart your PC and allow you to change firmware settings. Click the “Restart” button.
Finally, after restarting your PC, you will boot directly into the BIOS/UEFI interface. You’re in BIOS/UEFI now.
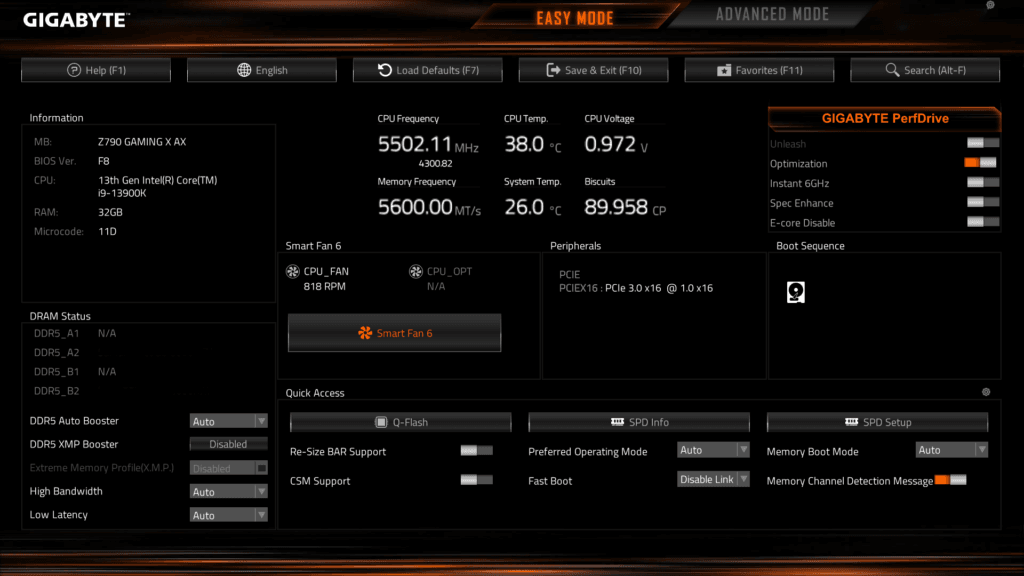
Here you can adjust boot order, enable or disable your motherboard’s features, overclock your CPU or RAM, and much more.
Method 2: Use BIOS Key During Boot (F2, DEL, ESC, etc.)
This is the classic method to open your BIOS or UEFI settings. For this method to work, you need to press the predefined hotkeys on good time, especially on modern PCs that boot very quickly.
To enter your BIOS or UEFI using this method. First, completely shut down your PC. Click the “Shut down” button on Windows 11 or 10, don’t restart it.
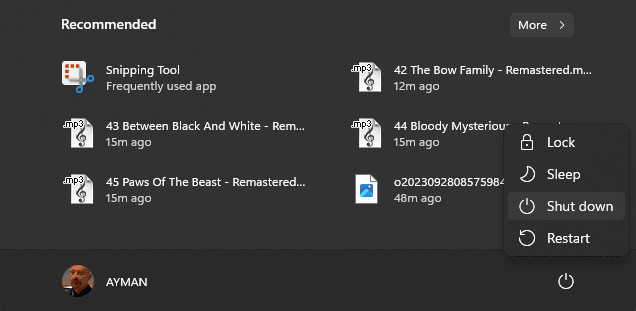
Second, turn your PC back on and immediately start pressing the BIOS key repeatedly. Don’t hold it, tap it repeatedly over and over until the BIOS interface shows up.

If done correctly, the BIOS/UEFI screen will appear before Windows starts loading.
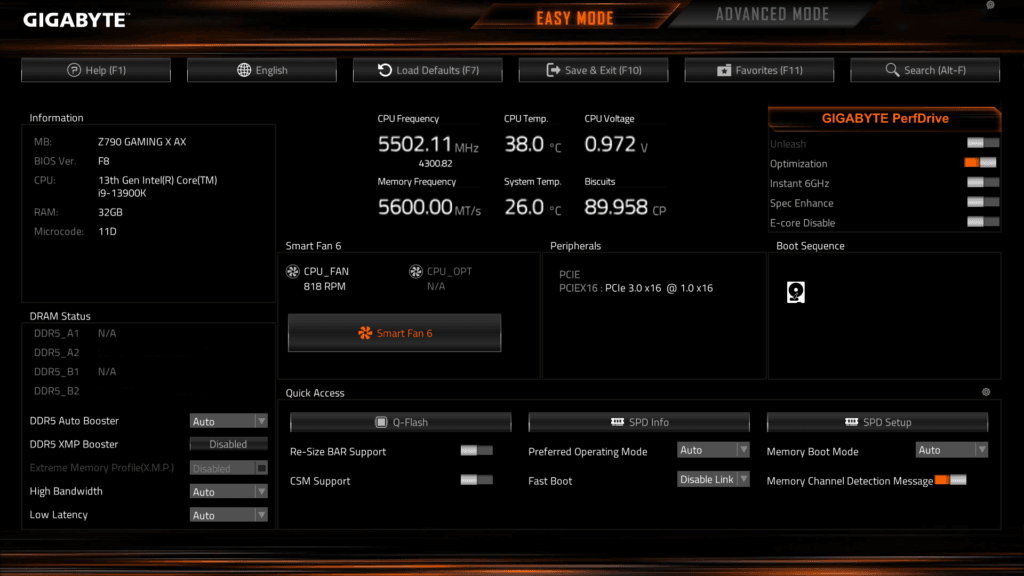
If Windows loads, you were too late; you must shut down your PC and try again.
Method 3: Open BIOS Using Command Prompt (Advanced Users)
This method is more advanced and uses CMD to enter your BIOS/UEFI to achieve the same result without using the Settings app and Recovery options.
It’s for people who want a direct, scriptable way to reboot straight into BIOS/UEFI. In this method, you are instructing Windows itself to restart straight into firmware settings.
To use this method. First, you must press Win + X and select Terminal (Admin)
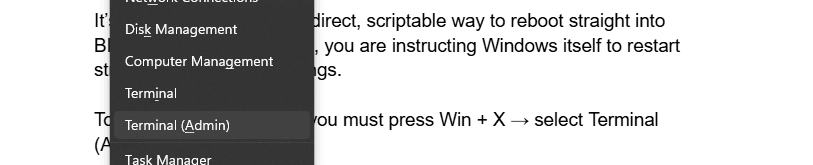
You can simply press on the “Start menu”. Type cmd in the search bar, then right-click on the Command Prompt icon and choose “Run as administrator”.
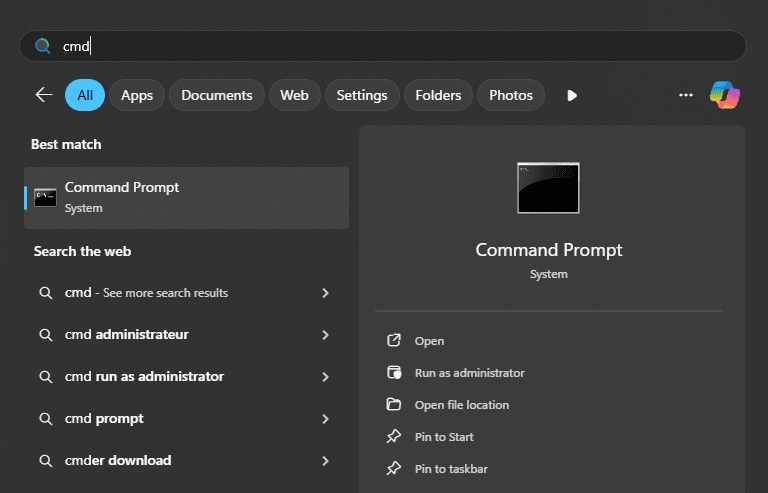
You must click on “Yes” once prompted by User Account Control (UAC).
Second, in the Command Prompt window, type the following command exactly as shown:
shutdown /r /fw /t 0- /r → Restarts the system
- /fw → Instructs the system to enter firmware (BIOS/UEFI) on reboot
- /t 0 → Sets the timer to 0 seconds (instant restart)
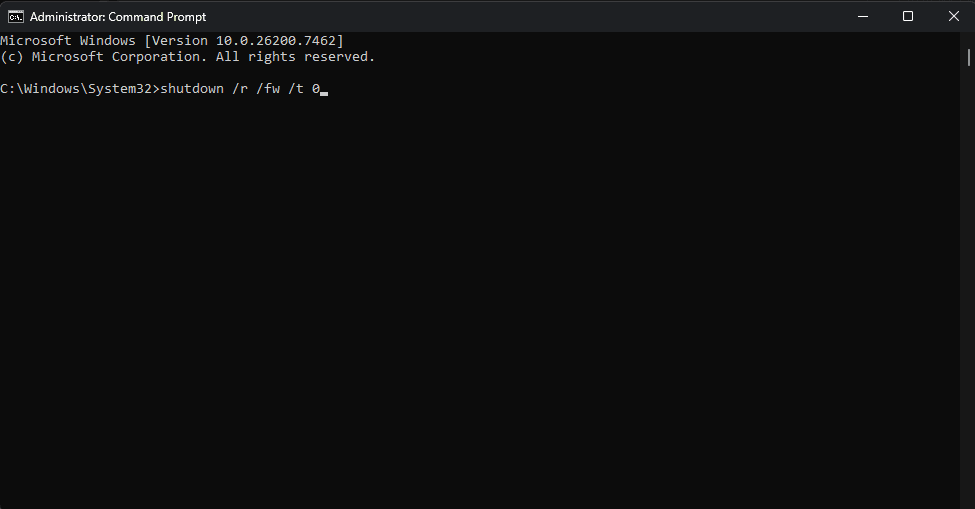
Then press Enter. Your PC will restart immediately, no keys are required, and Windows won’t load on your next restart; instead, your system will boot directly into BIOS / UEFI firmware settings.
BIOS Keys for Popular Brands (Asus, MSI, HP, Dell, Lenovo)
Different PC manufacturers use different keys to access the BIOS (or UEFI) during startup. You need to press the correct key right after turning on your PC and before Windows starts loading.
Here are the most common BIOS keys for popular brands:
| Brand / Manufacturer | Common BIOS / UEFI Key(s) | Notes |
|---|---|---|
| Acer | F2, Delete | Some systems may also use F12 for boot options |
| ASUS | F2, Delete | F2 for laptops; Delete often for desktop boards |
| ASRock | F2, Delete | Press repeatedly during POST |
| Dell | F2, F12 | F12 often goes to Boot Menu; F2 to BIOS |
| Gigabyte / Aorus | F2, Delete | Some models also use F12 for boot menu |
| HP | F10, Esc | Esc may show startup menu first |
| Lenovo | F1, F2 | Laptop models may require Fn + F2 |
| MSI | Delete | DEL is most common on motherboards & gaming PCs |
| Samsung | F2 | May vary by laptop model |
| Toshiba | F2 | Some older models used different keys |
| Other / Misc | F1, Esc, F10 | Depends on rare brands & models |
To enter BIOS, press the correct key repeatedly right after turning on your PC, before Windows starts loading. If you miss the timing and Windows boots, simply restart and try again.
On some laptops, you may need to hold the Fn key while pressing the BIOS key.
Conclusion
Accessing BIOS in Windows 11 or Windows 10 may seem intimidating at first, but with the right methods and understanding of your motherboard, it’s a straightforward process. You now know how to do that.
Many users enter the BIOS when upgrading or reinstalling their operating system. If you’re planning a fresh setup, especially on a new build, follow our step-by-step guide on how to install Windows 11 on a new PC to avoid common mistakes related to Secure Boot, TPM, and boot mode configuration.
You may also want to review how to disable Fast Startup in Windows 10, as this feature can interfere with firmware-level changes and troubleshooting.